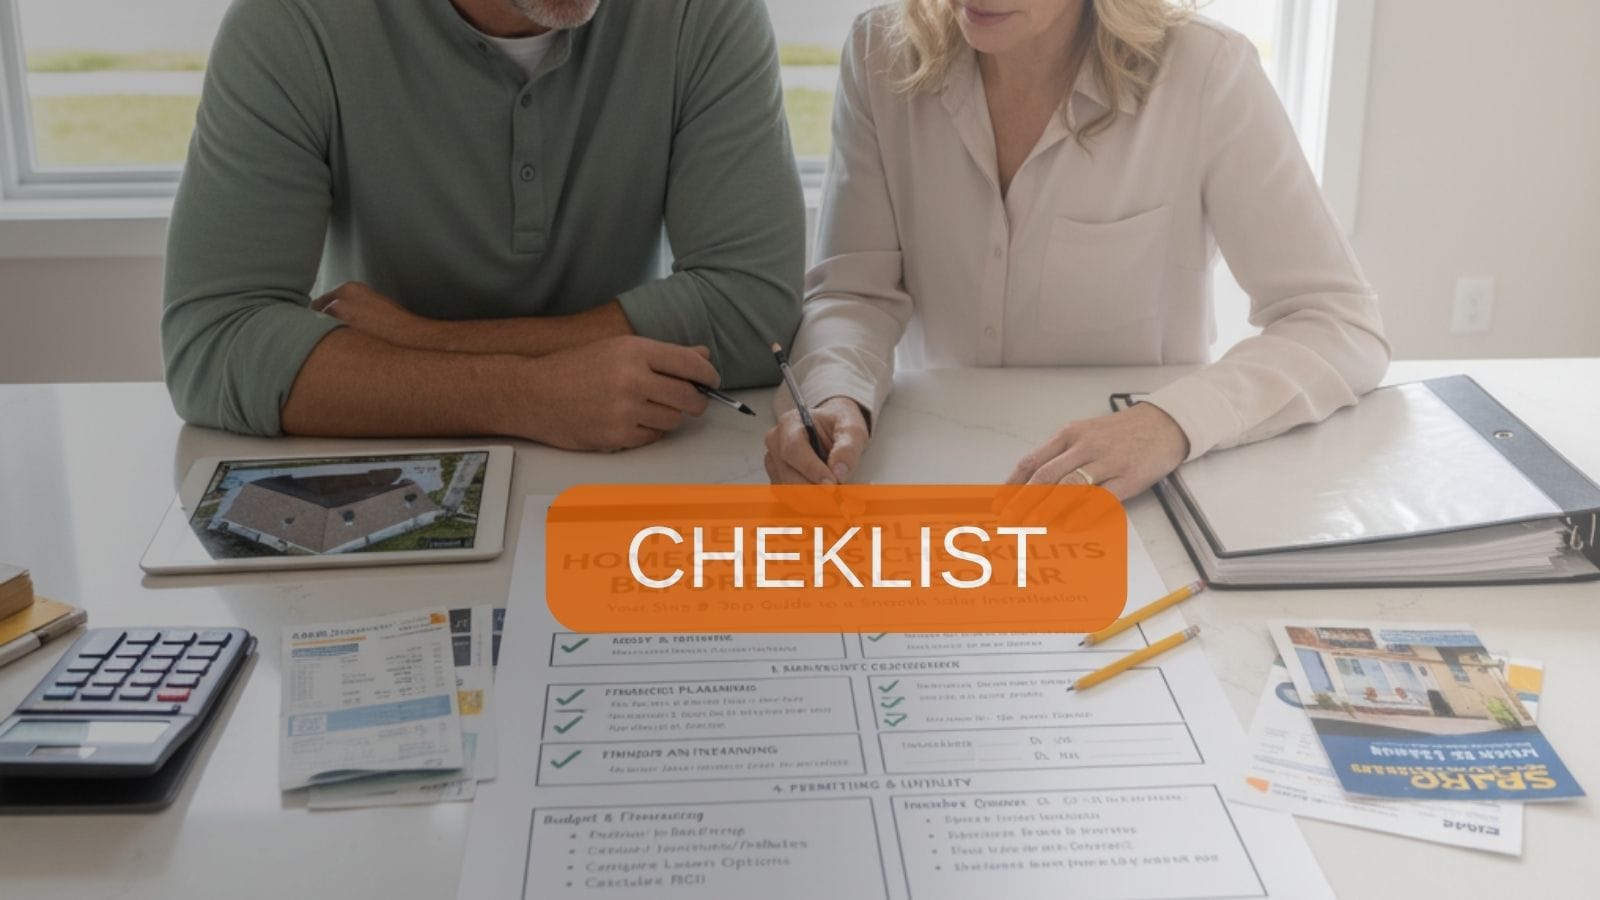
The Complete Homeowner’s Checklist Before Going Solar
Transitioning to solar energy is a strategic investment for homeowners seeking energy independence, long-term savings, and environmental sustainability. However, installing a solar panel system requires careful planning, a technical evaluation, and a solid financial analysis. To help you make the right choice, this comprehensive checklist outlines the critical factors every homeowner should consider before committing to a solar installation, based on sectoral standards and expert recommendations.
1. The Financial Assessment
Before you commit, get a clear picture of the financial implications. The first step is to analyze your past 12-24 months of electricity bills to understand your average annual consumption and your current cost per kilowatt-hour. Then, explore all available financial incentives. The federal solar Investment Tax Credit (ITC) can significantly reduce your upfront costs. Also, check for state-level rebates and local utility net-metering policies, as these can drastically shorten your payback period. Finally, compare multiple financing options, from cash purchases to loans or leases, to see which option provides the best long-term return on your investment (ROI).
2. The Technical & Site Evaluation
This is about determining if your home is a good fit for solar. An expert will perform a site evaluation to assess:
- Roof Suitability: The age and condition of your roof are critical. If your roof is nearing the end of its life, it may be a good idea to replace it before installation to avoid the cost of removing and reinstalling the panels later.
- Sunlight Exposure: The amount of sunlight your roof receives is the most important factor for production. A professional will use a sun path analysis to determine the best orientation (south-facing is ideal in the Northern Hemisphere) and to identify any potential shading issues from trees, chimneys, or neighboring buildings.
- Structural and Electrical Integrity: A professional will ensure your roof can handle the weight of the panels and that your home’s electrical panel can safely accommodate the new system. Any necessary upgrades will be factored into the final quote.
3. The Professional & Product Selection
The quality of your installation is as important as the technology itself. Vet potential installers by checking their credentials, reading customer reviews, and getting multiple quotes. Look for a NABCEP-certified installer, as this is the industry’s highest standard for quality and safety. Also, ask about the components they use. Reputable installers use Tier-1 panels and high-quality inverters with solid warranties, giving you peace of mind that your investment will last for decades.
By following this checklist, you can confidently navigate the solar installation process, ensuring that your transition to clean energy is not only a step toward sustainability but also a smart, financially sound investment.
1. Evaluate Your Home’s Solar Potential
Not all homes are equally suited for solar panel systems. The saying “location, location, location” applies not just to real estate, but to your roof as well. While solar technology is incredibly advanced, its performance is still dictated by a few critical factors that are unique to your home. According to the U.S. Department of Energy and other experts, optimal performance is achieved when panels face south and receive minimal shading throughout the day.
The Science Behind Your Roof’s Suitability
- Roof Orientation and Pitch: In the Northern Hemisphere, a south-facing roof is the gold standard for solar, as it receives the most direct sunlight throughout the day. However, that doesn’t mean other orientations are a lost cause. East- and west-facing roofs can still be highly effective, especially for homes with high morning or afternoon energy use, as they can produce power during those specific peak-demand hours. The angle of your roof, known as its pitch, also matters. For most U.S. latitudes, a pitch between 15 and 40 degrees is ideal for year-round production, but installers use specialized mounting systems to ensure panels are tilted for optimal performance even on flat roofs.
- Roof Condition: Your solar panels are designed to last for 25 to 30 years. Therefore, it’s critical that your roof has a similar or longer lifespan. Professionals recommend that your roof have at least 10-15 years of structural integrity left before a solar installation. This prevents the costly and labor-intensive process of removing and reinstalling panels just a few years down the line to replace a worn-out roof.
- Shading Analysis: Even a small amount of shade can significantly reduce a panel’s output. A thorough site assessment is essential to identify any potential obstructions. Installers use advanced tools like drone mapping, sun path simulations, and remote software to precisely model how sunlight will hit your roof at every hour of the day, in every season of the year. This ensures that the system is designed to avoid any shade from trees, chimneys, or nearby buildings, which is crucial for maximizing your solar yield.
A professional site assessment is the only way to get a precise and reliable estimate of a system’s potential. By carefully evaluating all of these factors, you can ensure that your home is not just suitable for solar, but is optimized for maximum savings and long-term performance.
2. Understand Your Current and Future Energy Needs
Accurate system sizing is arguably the most critical step in a solar installation. A system that’s too small won’t meet your energy needs, while one that’s too large can be an unnecessary expense. The key to getting it right is a detailed analysis of your home’s energy consumption.
Step 1: Analyze Your Energy Consumption
Before you can determine the size of your solar system, you need to know how much electricity you actually use. The best way to do this is to review your past 12-24 months of utility bills. This is crucial because it captures seasonal variations in your usage, which can be significant depending on your climate (e.g., high AC use in summer, high heating use in winter).
- Annual kWh Consumption: Find your average yearly electricity usage, typically measured in kilowatt-hours (kWh). While the U.S. average is around 10,600 kWh annually, your personal number will be the most valuable data point for your unique system design.
- Peak Load Patterns: Examine your highest energy demand periods. This is especially important in areas with Time-of-Use (TOU) rates. Understanding when you use the most electricity (e.g., early morning or late afternoon) allows an installer to design a system that produces power during those specific, high-cost periods.
Step 2: Consider Future Energy Needs & Efficiency
Don’t just plan for today; think about tomorrow. Will you be buying an electric vehicle (EV)? Are you planning to switch from a gas to an electric water heater? Any of these changes will increase your electricity consumption, and a smart system design will account for them to prevent the need for costly future upgrades.
Conversely, improving your home’s energy efficiency can actually reduce the size of the solar system you need. Before you size your system, consider upgrading your home with:
- Improved insulation and weather sealing.
- A more efficient HVAC system.
- Smart thermostats and LED lighting.
By lowering your overall demand first, you can often install a smaller, less expensive solar system that still meets 100% of your energy needs, optimizing your financial return.
Accurate consumption forecasting and a professional assessment are essential to ensure your system is perfectly sized, leading to faster payback and maximum long-term savings.
3. Research Local Solar Incentives and Policies
When evaluating the financial viability of a solar system, incentives are a game-changer. They can drastically reduce your upfront costs and accelerate your payback period, making a solar installation more accessible and more profitable.
The Power of the Federal Tax Credit
The cornerstone of solar incentives in the U.S. is the federal solar Investment Tax Credit (ITC). This is not a rebate or a cash payout; it’s a direct deduction from your federal tax liability. For eligible systems installed through 2032, the ITC allows you to claim 30% of your total system cost. This is a powerful incentive that can cut thousands of dollars off your final investment and make the financial case for solar much stronger.
State and Local Programs
In addition to the federal credit, many states and local governments offer their own incentives. These programs vary widely, so it’s essential to check what’s available in your specific area.
- State Rebates and PBIs: Some states offer direct cash rebates that reduce the upfront cost. Other regions have Production-Based Incentives (PBIs), which pay you for every kilowatt-hour of electricity your system generates over a set period. These can provide a steady, long-term revenue stream that makes a huge difference in your ROI.
- Net Metering Policies: Net metering is a critical policy that allows you to sell excess energy back to the grid for credit. While policies vary, a favorable program with a 1:1 credit ratio can make your solar system far more valuable by effectively using the grid as a large battery.
- Tax Exemptions: Many jurisdictions also offer tax benefits. It’s common for solar equipment to be exempt from sales tax, and in some areas, the added value of a solar system to your home is also exempt from property tax assessments. This ensures you’re not penalized for making a valuable home improvement.
A Professional’s Advice
Navigating the world of solar incentives can be complex. For a comprehensive and up-to-date list of all the programs available in your area, consult the Database of State Incentives for Renewables & Efficiency (DSIRE). A qualified installer can also help you understand which incentives you’re eligible for and how to apply them to your final cost, ensuring you get the maximum financial benefit from your investment.
4. Choose the Right Solar Technology and Components
Navigating the world of solar equipment can be overwhelming, but understanding the core components is key to a successful installation. From the panels on your roof to the inverters that power your home, the quality and type of each component will directly impact your system’s performance, durability, and financial return.
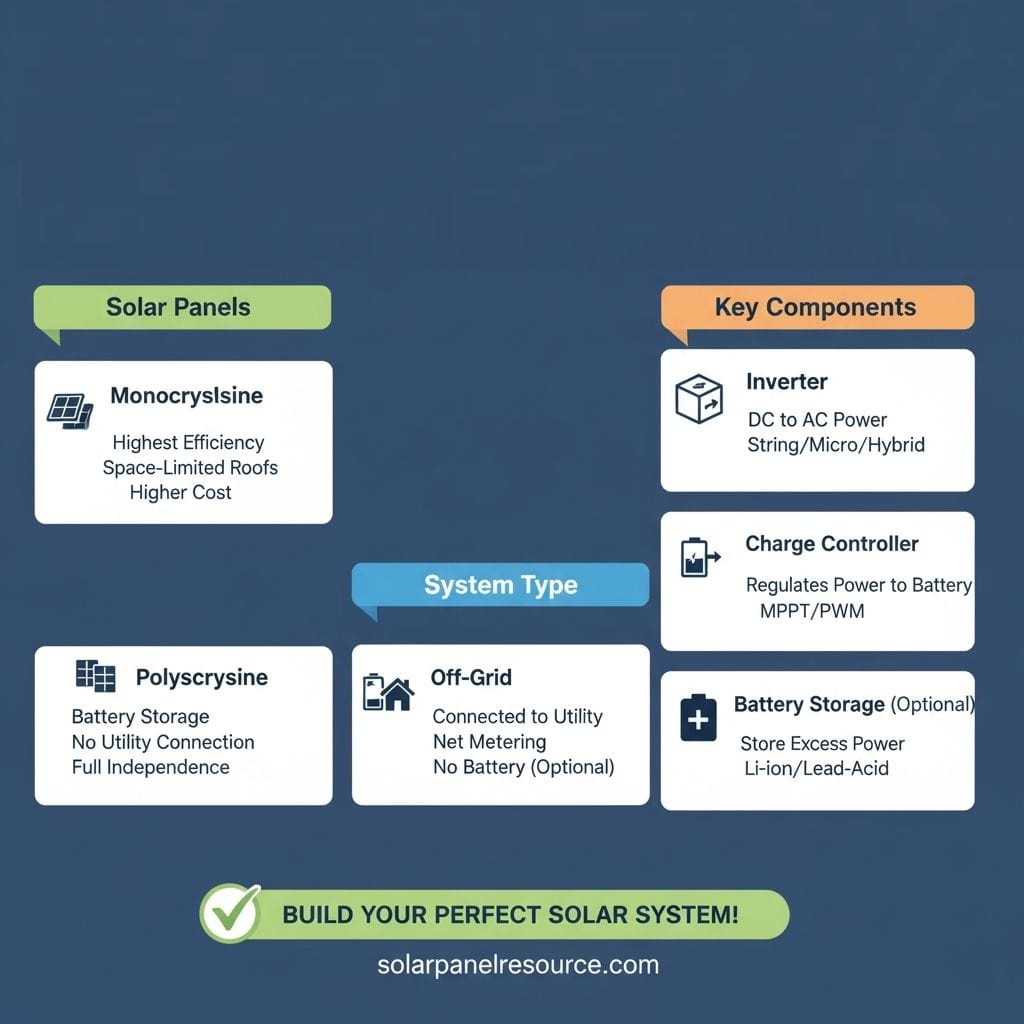
1. Panel Technology: Mono vs. Poly
- Monocrystalline Panels: These are the most popular and efficient choice for residential installations. Made from a single, pure silicon crystal, monocrystalline panels are visually sleek and black. Their high efficiency, often ranging from 20–22%, means they can produce more power in a smaller footprint, making them ideal for homes with limited roof space.
- Polycrystalline Panels: While once a common, more affordable alternative, polycrystalline panels are now largely obsolete due to their lower efficiency (typically 15–17%) and a less appealing blue, speckled appearance. The industry has shifted almost entirely to high-efficiency monocrystalline and newer N-type cell technologies, which offer a superior return on investment.
2. Inverters: The Brains of the System
The inverter converts the DC electricity from your panels into AC power for your home. Your choice of inverter has a major impact on your system’s design and performance.
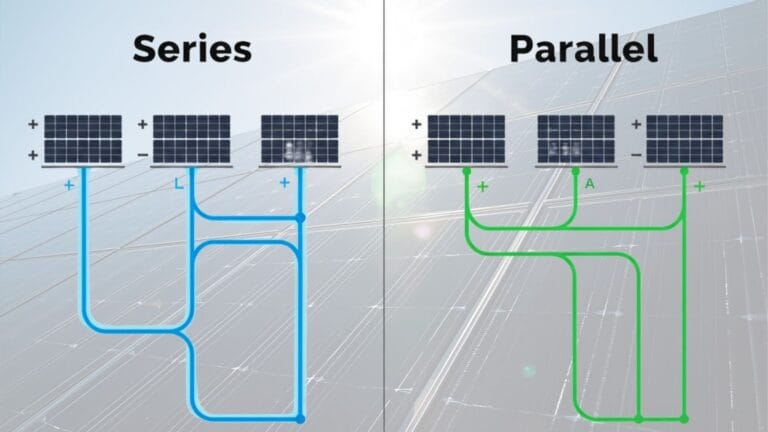
- String Inverters: The most affordable option. They connect a series, or “string,” of panels to a single central inverter. They are best for roofs with minimal shading and a single, clear orientation.
- Microinverters: These are a premium choice. A small inverter is installed under each panel, allowing every panel to operate independently. This is the ideal solution for roofs with complex angles or shading, as the underperformance of one panel will not affect the output of the others.
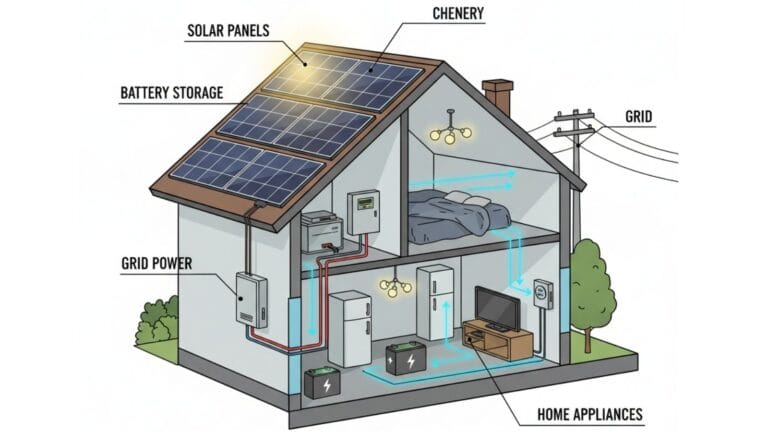
- Hybrid Inverters: These models combine a traditional inverter with a battery charger, making them essential for homes with battery storage. They offer the flexibility to manage and optimize both solar production and battery usage.
3. Batteries and Storage
While not required, a lithium-ion battery (like the popular Tesla Powerwall or Enphase IQ Battery) allows you to store excess solar energy for use at night, during a grid outage, or during peak-rate hours. Batteries provide true energy independence and can significantly enhance your savings, especially in regions without favorable net metering policies.
4. Warranties and Certifications
A solar system is a 25+ year investment, and its warranty is your long-term insurance policy.
Certifications: Look for components with certifications from organizations like UL (Underwriters Laboratories) and IEC 61215, which verify that the equipment has been rigorously tested for safety, durability, and performance.
Performance Warranty: Reputable manufacturers provide a performance warranty, guaranteeing that a panel will produce at least 80–85% of its original output after 25 years.
Product Warranty: This covers the physical integrity of the panel itself, typically for 12–25 years against defects.
5. Analyze Financing Options and Long-Term ROI
Solar installation is a significant financial investment, but it’s not a one-size-fits-all process. Understanding the various financing models is essential to optimizing your investment and ensuring a fast return. Each option has a distinct impact on your upfront costs, ownership, and long-term savings.
1. Cash Purchase: Maximum ROI and Ownership
This is the most straightforward and financially beneficial option in the long run. By paying for the system with a cash purchase, you avoid all interest payments and financing fees. While the initial investment is the highest, this model offers the fastest payback period—typically just 6-8 years—and the highest long-term savings. You also gain full ownership of the system, making you eligible for all federal and state incentives, including the lucrative 30% federal Investment Tax Credit (ITC).
2. Solar Loans: The Most Common Path to Ownership
For most homeowners, a solar loan is the most popular way to go solar. It allows you to own the system without the high upfront cost of a cash purchase.
- How it works: You take out a low-interest loan to cover the cost of the system. Your monthly loan payment is often structured to be lower than your new, reduced electricity bill, giving you immediate savings.
- Benefits: You still receive all the financial benefits of ownership, including the federal tax credit. You can use the tax credit to pay down a significant portion of the loan principal, which can greatly reduce your monthly payments or shorten your loan term. You may also be able to deduct the interest you pay on the loan from your taxes, but this depends on the type of loan you choose.
- Considerations: While interest rates can range widely, many solar loans offer rates comparable to a car loan. It’s crucial to shop around and compare loan terms from multiple providers to find the best rate and a manageable payment plan.
3. Solar Leases & PPAs: Low Upfront Cost, Limited Benefits
Solar leases and Power Purchase Agreements (PPAs) are third-party ownership models. They are popular because they require little to no money down, making them accessible to a wider range of homeowners.
- How they work: In a solar lease, you pay a fixed monthly “rent” for the solar system installed on your roof. In a PPA, you pay for the electricity the panels produce at a fixed, lower rate per kilowatt-hour, similar to your utility bill.
- Benefits: The main draw is the lack of upfront cost and the fact that the third-party company is responsible for all maintenance and repairs.
- Major drawbacks: You do not own the system, which means you are not eligible for any ownership-based incentives like the federal ITC. This greatly reduces your long-term savings and return on investment. Furthermore, these contracts often have “escalator clauses” that increase your payments each year, and they can complicate the process of selling your home.
Ultimately, your choice depends on your financial situation and long-term goals. While leases and PPAs offer an easy entry into solar, buying the system outright or with a loan will provide the highest return and the greatest control over your energy future.
6. Vet Solar Installers and Review Proposals
Choosing a reputable installer is perhaps the single most critical decision you’ll make in the entire solar process. The quality of their work directly impacts your system’s safety, performance, and long-term viability. Here’s how to find a professional you can trust.
1. Check for Certifications and Licensing
Don’t settle for less than the best. Look for an installer with a NABCEP (North American Board of Certified Energy Practitioners) Certification. This is the gold standard in the industry. NABCEP-certified installers have demonstrated their knowledge and skills through a rigorous certification process, which includes passing a comprehensive exam and having documented experience in the field. This certification provides assurance that the installer is up-to-date on the latest safety, design, and installation standards. Beyond that, verify that the company has a valid state electrical license and the appropriate insurance coverage for both workers’ compensation and general liability.
2. Request Local References and Reviews
A reputable installer should be proud of their work and have a portfolio to show for it. Ask for a list of recent projects in your area and, if possible, reach out to those customers to ask about their experience. Don’t just rely on testimonials on the company’s website; check independent review sites like Google, Yelp, and the Better Business Bureau (BBB). Pay attention to how the company responds to negative feedback—a professional installer will address concerns calmly and professionally.
3. Compare Proposals and Avoid Red Flags
Once you have vetted a few companies, get at least two or three detailed proposals. This is crucial for an apples-to-apples comparison. A quality proposal should include:
- A clear system size in kW.
- The brand and model of all equipment, including panels, inverters, and racking.
- A detailed projection of energy output and savings.
- A breakdown of all costs, including equipment, labor, permits, and fees.
- Comprehensive warranty information, including both the manufacturer’s warranty on the equipment and the installer’s warranty on the workmanship.
Be wary of proposals that are significantly cheaper than others, as this often indicates corners are being cut on materials or labor. A professional installer will be transparent about their pricing and willing to answer any and all of your questions.
7. Plan for Permitting, Inspection, and Grid Connection

A crucial but often underestimated part of any solar installation is the permitting and inspection process. This isn’t just about red tape; it’s a vital series of steps designed to ensure your system is safe, legal, and correctly interconnected with the grid. An experienced installer will manage this process for you, but understanding the timeline and key milestones will give you peace of mind.
The Three-Phase Approval Process
- Permit Applications: After the system design is finalized, your installer will prepare and submit the necessary permits to your local municipality. This typically includes a building permit to verify the structural integrity of your roof and ensure the installation complies with local building codes, as well as an electrical permit to confirm all wiring and components meet safety standards like the National Electrical Code (NEC). Depending on your location, you might also need a zoning or fire permit.
- Utility Interconnection Agreement: This is a formal contract between you and your utility company that grants permission for your system to be connected to and operate in parallel with the grid. The utility reviews your system design to ensure it won’t negatively impact grid stability or present a safety hazard to their workers. Your installer will submit the required documentation and manage this process, which can take several weeks or even months.
- The Inspection Process: Once the installation is complete, two final inspections are usually required. The first is a local government inspection to ensure the system was built according to the approved permits and complies with all safety codes. The inspector will check everything from the mounting hardware to the electrical wiring. The second is a utility inspection, which often involves a representative checking the final installation before granting Permission to Operate (PTO). This is the moment you can officially flip the switch and start generating your own power.
It’s important to remember that any missing paperwork or minor discrepancies can cause significant delays. This is why choosing a reputable installer who is familiar with your local jurisdiction’s specific requirements is so crucial—they know the process, can properly fill out all the documentation, and can help ensure a smooth, on-time installation.
8. Prepare for Long-Term Maintenance and Monitoring
Solar systems are designed to be low-maintenance, but occasional cleaning and monitoring are essential to ensure optimal performance. Just like a car, a little preventive maintenance goes a long way toward protecting your investment and maximizing your energy production.
1. The Importance of Cleaning
While rain can wash away some dirt, it often isn’t enough, especially in dusty areas or if your panels have a build-up of pollen or bird droppings. A dirty panel can reduce your energy output by 5–15%, directly impacting your savings. Experts recommend visually inspecting your panels a couple of times a year and cleaning them 1–2 times per year, depending on your location.
- DIY Cleaning: For most homeowners, cleaning can be a simple DIY task. Use a garden hose to spray down the panels from the ground. For stubborn dirt, use a soft cloth or a long-handled brush with warm, soapy water. Avoid using abrasive materials or pressure washers, which can scratch the glass and void your warranty.
- Professional Cleaning: If your panels are difficult to access, consider hiring a professional. The average cost for professional cleaning is $150–$500, depending on the number of panels and accessibility. This is a small price to pay to ensure safety and maintain your system’s efficiency.
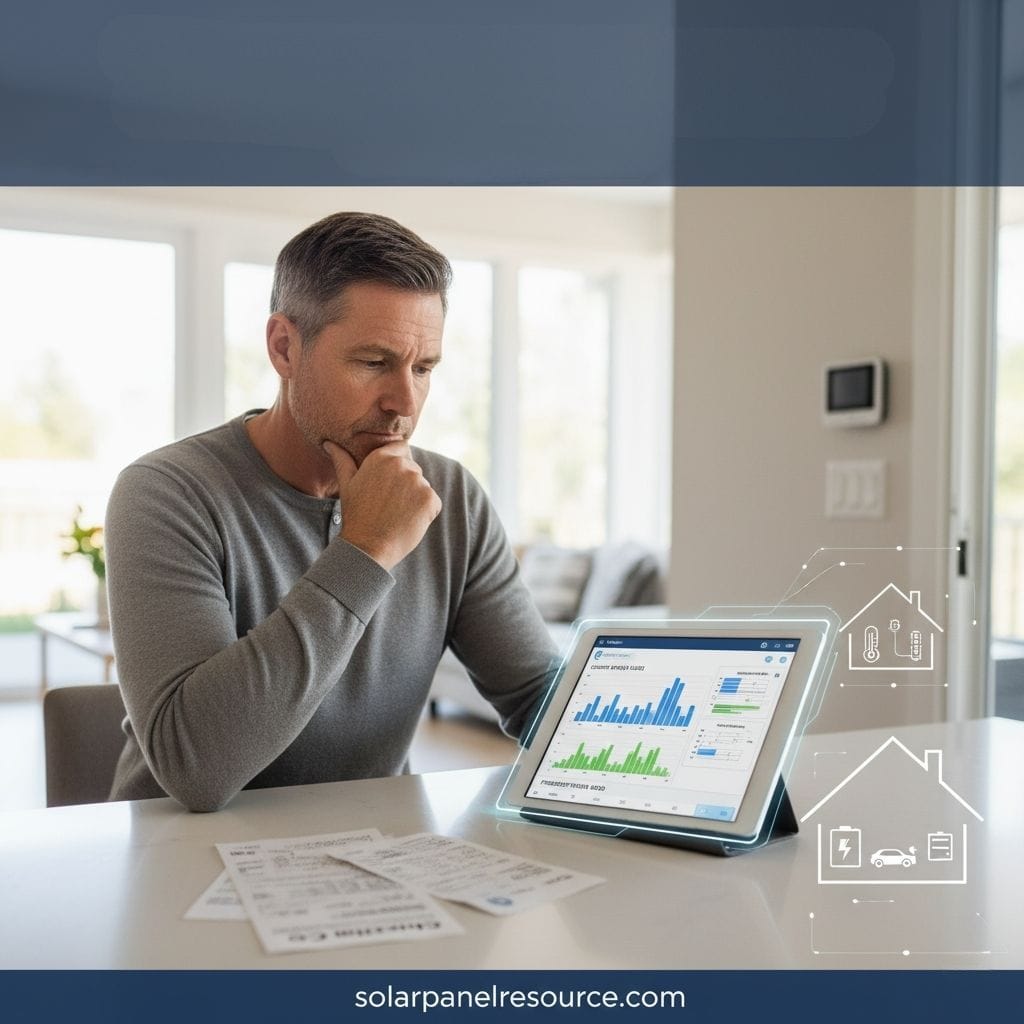
2. Proactive Monitoring
Your solar system isn’t just a set of panels; it’s an intelligent energy system. Modern solar inverters come with apps and web platforms that give you real-time access to your system’s performance.
- Track Production: Monitor your daily, weekly, and monthly energy output. On a sunny day, your production should follow a smooth, bell-shaped curve. A sudden dip or consistent underperformance is a red flag that could indicate an issue like shading from a newly grown tree or a faulty component.
- Identify Problems Early: Many monitoring apps can alert you to a system error or a panel that has stopped producing. Catching a problem early can prevent significant energy loss and potential damage to your system.
3. Warranty & Service Compliance
Your system’s components are backed by long-term warranties, but some require regular maintenance to remain valid. Always review your warranty documents to understand your responsibilities. While your panels will have a 25-year performance warranty, the inverter and other components may have shorter warranties (10-15 years). Address any inverter or battery failures promptly by contacting your installer or an authorized service provider to ensure the fix is covered and done by a certified professional.
A Strategic and Informed Solar Transition
Going solar is a monumental decision, a journey that involves more than just putting panels on a roof. It requires careful planning, technical evaluation, and financial analysis. By following this comprehensive checklist, you can navigate the complexities of solar adoption with confidence and clarity.
A successful solar project is a combination of these elements:
- Proper site assessment, which ensures your home is a good candidate for solar and maximizes your system’s output.
- Realistic financial budgeting, which accounts for incentives and chooses the right financing model for your financial goals.
- Thorough vetting of your installer, which ensures your system is safe and backed by reliable warranties.
- Understanding the permitting process, which is critical for legal and safe operation.
- A commitment to ongoing monitoring, which ensures your system performs optimally for decades to come.
With rising utility rates and continued policy support, residential solar in 2025 offers both powerful environmental and economic advantages. It’s a way to take control of your energy future, lock in predictable costs, and make a valuable investment in your home. Approaching this process with due diligence and expertise isn’t just a recommendation—it’s the only way to ensure your solar journey is a success.
To learn more about solar panels, check out our blog.

Solar Energy Enthusiast & Renewable Energy Researcher
Vural’s journey into solar energy began four years ago, driven by frequent power outages and high electricity bills at his own home. He has since gained hands-on experience with both personal and commercial solar projects. At solarpanelresource.com, Vural shares his real-world insights and in-depth research to guide homeowners and business owners on their own path to energy independence.