The Professional Solar Installation Process: A 2025 Guide
Installing solar panels on your roof is a complex, high-stakes project that should only be handled by certified professionals. This is not a safe or practical DIY job.
If you’re considering hiring an installer, you probably have questions about what the process actually involves. This guide breaks down the exact steps professional installers take—from the initial roof assessment to the final activation—so you know what to expect and can make an informed decision.
The 5 Steps of Professional Solar Installation
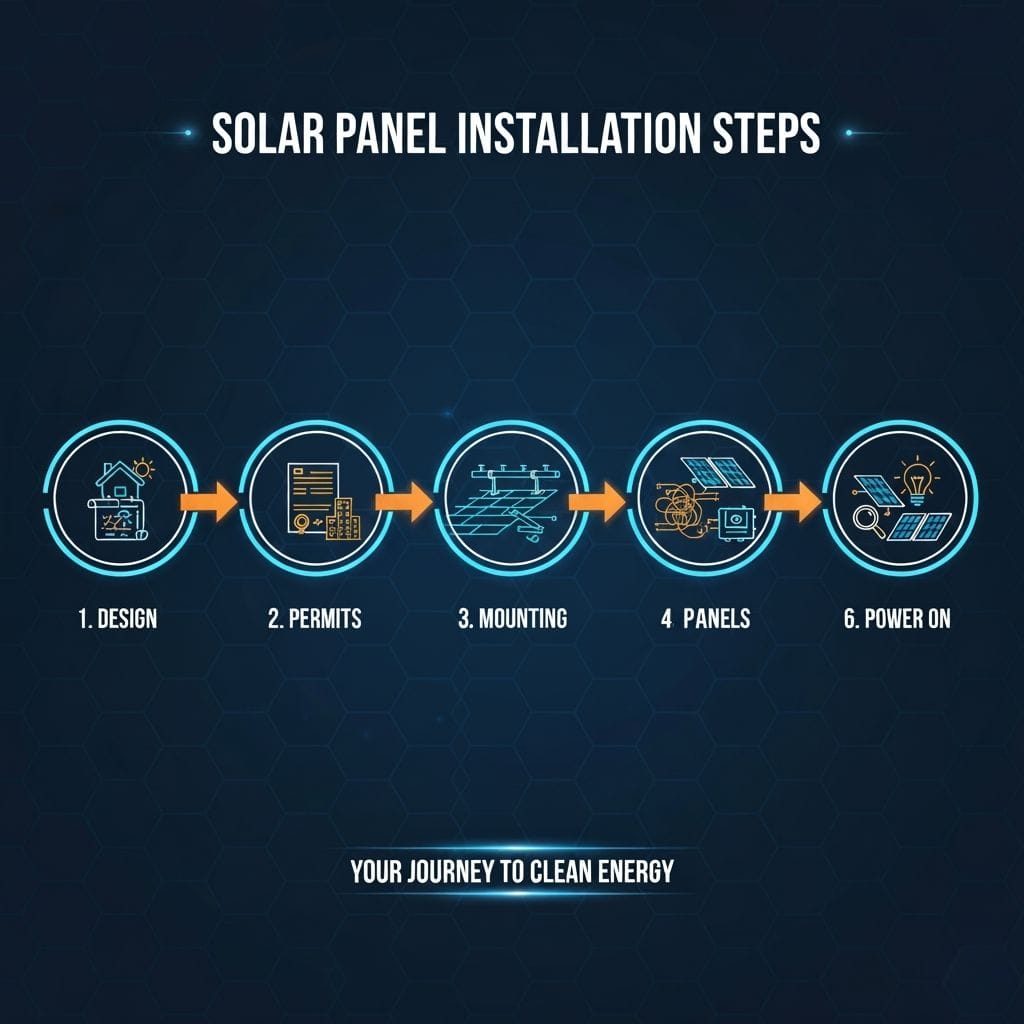
Step 1: The Expert Site Evaluation and Roof Assessment
This is the foundational step of any solar project. A professional solar technician won’t just glance at your roof; they will perform a comprehensive analysis to determine its viability. This includes:
- Roof Health & Structural Integrity: The technician will inspect your roof’s condition, age, and material to ensure it can support the weight of the panels. If your roof is nearing the end of its life, they’ll advise you to replace it first to avoid the significant cost of a solar removal and reinstallation later on.
- Sun Exposure: Using advanced software, they’ll analyze your roof’s orientation and conduct a shading analysis to map out sunlight patterns throughout the year. Even a small amount of shade from a tree or chimney can drastically reduce your system’s output.
Step 2: Tailored System Design and Component Selection
Once the evaluation is complete, the installer will design a system that is perfectly tailored to your home.
- Energy Usage: The number of panels and the overall system size are determined by your household’s energy consumption. A professional will analyze your past 12 months of utility bills to find the right system size to meet your energy needs.
- Component Selection: Based on your roof’s characteristics and your budget, the installer will select the right type of panels (e.g., monocrystalline, which are more efficient) and the appropriate inverter to optimize performance.
Step 3: Handling Permits and Applying for Incentives
This is often a complex step that a professional installer manages on your behalf. They will:
- Secure Permits: Most local governments require building and electrical permits to ensure the installation meets safety codes. Your installer will prepare the necessary engineering plans and documentation and submit them to the local Authority Having Jurisdiction (AHJ).
- Apply for Incentives: This is the time to apply for all available financial incentives, such as the federal Investment Tax Credit (ITC) and any local rebates or credits. An experienced installer will know the ins and outs of these programs, ensuring you get the maximum benefit.
Step 4: The Physical Roof Installation
With permits in hand, the physical installation can begin. Installers will meticulously follow industry standards set by organizations like the Solar Energy Industries Association (SEIA) to ensure a high-quality installation, from securely attaching the mounting hardware to professionally wiring the panels and the inverter.
Step 5: Final Inspection and Permission to Operate (PTO)
Your system is not ready to go until it passes a final safety check.
System Activation: Once you have PTO, you can switch on your system and begin generating your own clean, renewable energy.
Inspections: The local building inspector will perform a final check to ensure all work meets code. Once that’s complete, your utility will perform a final inspection to grant you Permission to Operate (PTO).
What Is the 120 Rule for Solar Panels?

The 120% rule is a critical safety provision from the National Electrical Code (NEC) that governs how a solar system can be connected to your home’s main electrical panel. Understanding this rule is essential for ensuring your solar installation is not only efficient but also safe and compliant.
The Technical Basics: What is the 120% Rule?
The 120% rule states that the total current supplied to a panelboard, including both the main power from the grid and the power from your solar system, must not exceed 120% of the busbar’s ampacity rating.
- Busbar Rating: This is the maximum current that your electrical panel’s main busbar is designed to handle. For most modern homes, this is 200 amps.
- Solar Backfeed: This is the current that your solar system “backfeeds” into your electrical panel.
The rule allows for a safe margin to ensure the panel’s internal components and conductors never overheat, even under a worst-case scenario where both the grid and the solar system are pushing maximum current.
A Practical Example
Let’s say your main electrical panel has a busbar rating of 200 amps. According to the 120% rule, the combined current flowing through the busbar cannot exceed 240 amps (
200 amps×1.20
). Since the main breaker already uses up 200 amps of that capacity, your solar system can backfeed up to 40 amps into the panel (
240 amps−200 amps
). This simple calculation ensures that your solar system works in harmony with your home’s existing electrical infrastructure without risking an electrical hazard.
Why It’s So Important
The 120% rule is a non-negotiable safety measure that prevents overheating, equipment damage, and fire. Violating this rule can void your system’s warranty, lead to a failed inspection, and, in a worst-case scenario, create a dangerous electrical fault. A professional solar installer will always follow this rule, as it is a foundational principle of electrical safety in the solar industry.
How Professionals Size Your Solar System
Figuring out the right number of panels isn’t a guess—it’s a precise calculation that professionals call “system sizing.” An installer’s primary goal is to design a system that perfectly matches your energy needs without oversizing (which costs you extra) or undersizing (which leaves you disappointed). Here’s how they determine the perfect fit for your home.
Step 1: Analyzing Your 12-Month Energy Consumption
A professional installer’s first request will be for your last 12 months of electricity bills. This is essential because it accounts for seasonal variations in your usage (e.g., high A/C use in summer). They will analyze this annual kilowatt-hour (kWh) consumption to establish a precise baseline for your home’s total energy demand, which is the foundation of their design.
This baseline determines your required system size (measured in kW). While every home is unique, here are the common system sizes professionals typically quote based on household consumption:
Small System (3 kW): For households with low energy consumption. This size (roughly 8-10 high-efficiency panels) can offset a significant portion of a smaller home’s bill.
Medium System (6-7 kW): The most common residential size. Typically 16-20 panels, this is often designed to cover most or all of an average family’s electricity usage.
Large System (10 kW+): For high-consumption homes, especially those with a swimming pool, central A/C, or electric vehicle charging. This could require 25 or more panels.
Step 2: Adjusting for Roof Factors, Shading, and Local Weather
Simply matching your energy usage isn’t enough. The installer will then conduct a detailed site assessment that accounts for:
- Roof Tilt and Orientation: A professional will use software to model how your roof’s angle and orientation (e.g., south-facing, east-west) will affect the panels’ energy production.
- Local Weather and Shading: Your location’s average sunlight hours and potential shading from nearby trees, chimneys, or other structures can reduce a system’s output. A professional will factor this into their final design to ensure your system meets your expectations.
- Available Space: The installer will measure your roof’s unobstructed space to confirm it can fit the required number of panels (a typical panel is around 6 x 3.5 feet).
- Structural Integrity: Your roof must support the additional weight of the panels and mounting hardware. A qualified installer will conduct a roof load calculation to ensure your roof is structurally sound and can safely handle the extra weight, especially with snow or wind loads.
While there are many online calculators that can give you a quick estimate, a free, professional consultation from an installer is the best way to get a precise, accurate system size tailored to your home.
What Is the Gap Between Solar Panels on a Roof?
The spacing between solar panels is a crucial aspect of system design that goes beyond simple aesthetics. While it might seem like a waste of space, a professional installer leaves a gap for a few very important technical and safety reasons that directly impact your system’s performance and longevity.
1. Thermal Management and Efficiency
The most significant reason for spacing is to promote airflow. Solar panels, like all electronics, operate less efficiently at high temperatures. They have a negative temperature coefficient, meaning that for every degree Celsius above 25°C (77°F), their power output decreases by a small percentage (typically around 0.3-0.5%). By maintaining a gap of 1 to 3 inches between panels, installers ensure that air can circulate freely underneath and around the array, preventing heat buildup and allowing the panels to perform at their highest possible efficiency.
2. Thermal Expansion and Maintenance
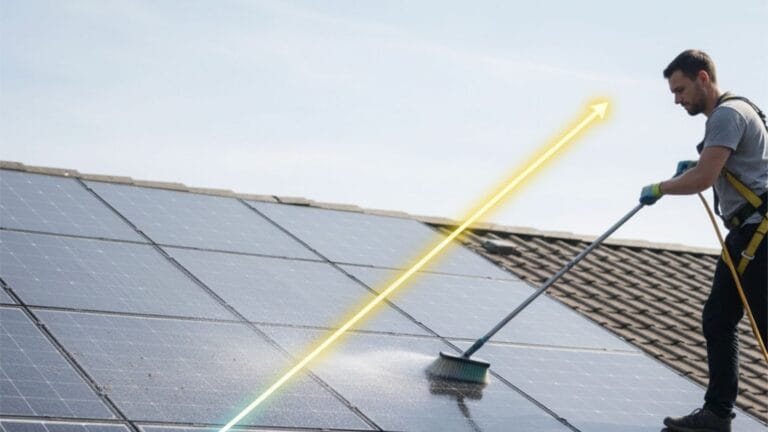
Proper spacing also accounts for the physical properties of the panels themselves. Solar panels are made of materials that expand and contract with temperature changes. A small gap provides the necessary room for this thermal expansion, preventing the panels from pushing against each other and potentially causing stress or damage to the frames over time. The gap also simplifies maintenance. It provides installers and technicians with a clear path to access individual panels, wiring, and mounting hardware for inspections or repairs without having to remove large sections of the array.
3. The Risk of Overcrowding
Overcrowding panels to save space can lead to serious problems. Not only does it create hot spots that reduce efficiency, but it also increases the risk of damage. Without proper spacing, panels can warp or crack due to thermal stress. It can also make it difficult to perform routine maintenance or diagnose a faulty panel, which can lead to extended downtime and reduced energy production.
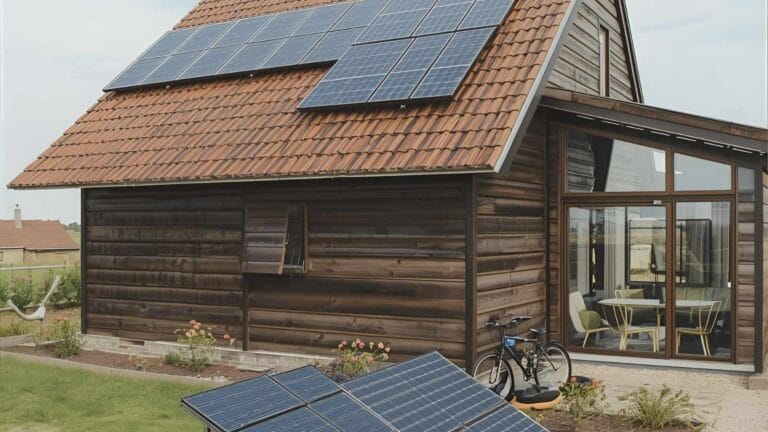
Can Solar Panels Be Installed Without Drilling?
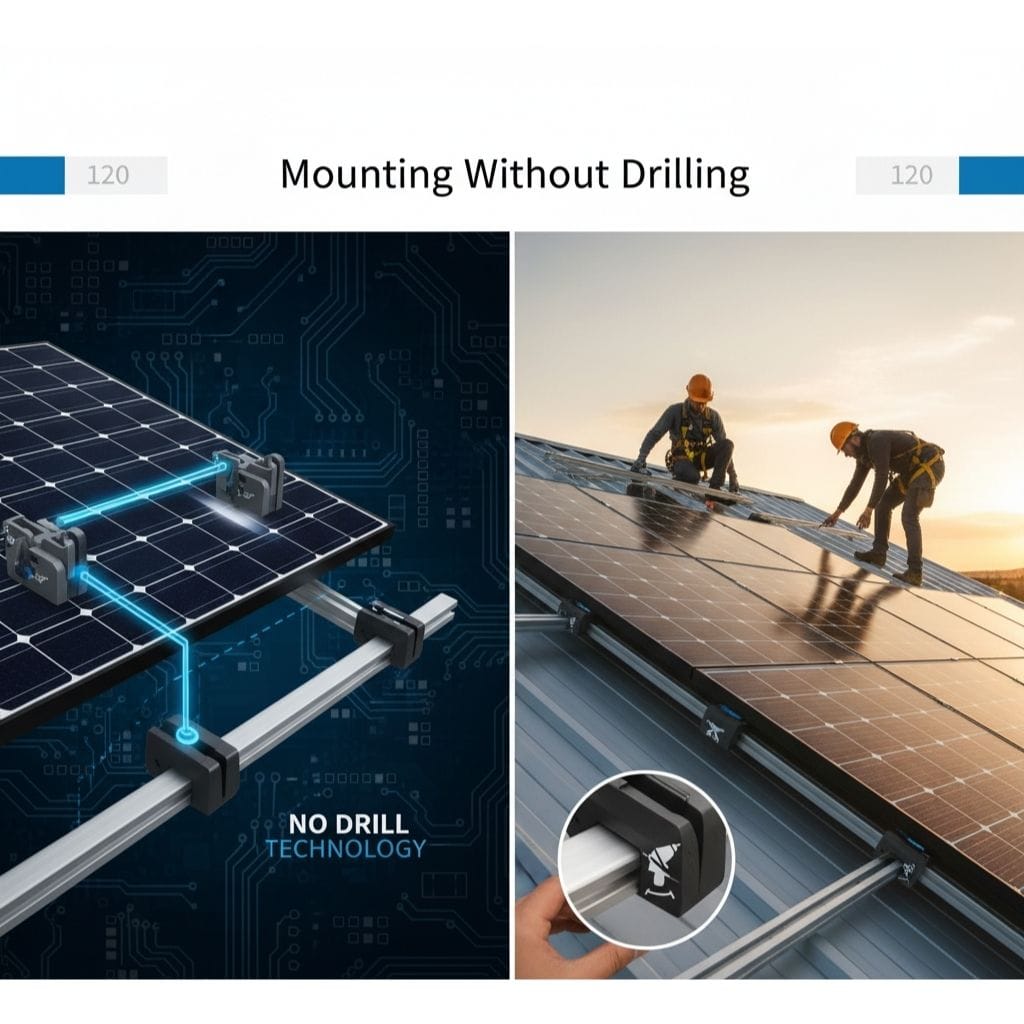
For many homeowners, the thought of drilling dozens of holes in their roof to install solar panels is a major concern. The good news is that mounting without drilling is not only possible but also a highly effective solution on certain roof types. These non-penetrating mounting systems preserve your roof’s integrity and are a major selling point for both flat and metal roofs.
The Power of Non-Penetrating Systems
These innovative mounting methods eliminate the risk of leaks and are a great option for homeowners who want to protect their roof’s warranty.
- For Flat Roofs: Ballasted Systems On a flat roof, installers use a ballasted system. This consists of a racking framework that is weighed down by heavy blocks, typically concrete, to hold the panels in place. This method is ideal because it requires zero roof penetrations, making it a secure and watertight option. However, it requires a professional engineering assessment to ensure the roof can support the added weight, and a thorough wind uplift analysis is necessary to determine the correct amount of ballast.
- For Standing-Seam Metal Roofs: Clamps Standing-seam metal roofs have raised seams that are perfect for solar. Installers use specialized clamps that attach directly to these seams, securing the racking without the need for drilling. This method is considered the gold standard for metal roofs because it protects the roof’s waterproofing and does not void the manufacturer’s warranty.
Engineering for Wind and Weather
While these systems don’t rely on drilling, they are meticulously engineered to handle extreme conditions. Before installation, a professional will conduct a thorough wind load and snow load analysis for your specific location. This ensures the system is designed to withstand the forces of nature, providing you with a secure, long-lasting solar array that won’t compromise your roof.
Solar Panel Installation Cost
Understanding the cost of a solar panel system is the first step toward making a smart investment. While prices can vary based on location and system size, there are predictable trends and incentives you can count on.
The Cost of Going Solar
In 2025, the average installed cost for a residential solar system ranges from $2.50 to $3.50 per watt. This price includes all components, such as panels, inverters, racking, and professional labor, as well as permits and fees. A typical 5 kW system for an average home would cost between $12,500 and $17,500 before any incentives.
It’s important to note that economies of scale often apply to solar projects. The cost per watt is typically lower for larger systems because many of the fixed costs, such as permitting and labor, are spread across more panels. For example, a 10 kW system may not cost double the price of a 5 kW system.
The Power of Incentives
The price on a quote is never your final out-of-pocket cost. Smart financial planning involves taking full advantage of all available incentives.
- Federal Investment Tax Credit (ITC): This is the single most significant incentive for homeowners. In 2025, you can claim a 30% tax credit on the total cost of your solar system. This is a direct reduction of your tax liability, not a deduction. For our example 5 kW system, this could be a credit of up to $5,250, bringing the net cost down significantly.
- State and Local Rebates: Many states, like California and New York, offer additional rebates or performance-based incentives that can further reduce your upfront costs.
- Net Metering: This isn’t a direct cost reduction, but it’s a critical financial benefit. Net metering programs credit you at the retail rate for any excess electricity your system sends back to the grid.
By combining these incentives, you can drastically reduce your initial investment and significantly improve your long-term return.
How Much Do 400 Watt Solar Panels Cost?
Choosing the right solar panels for your home is a key part of your investment. While the price per panel is a factor, an expert approach considers the total system cost and the long-term value provided by the panels’ efficiency and warranty.
The Cost of a Single Panel
As of 2025, a single 400W solar panel typically costs between $200 and $300 at retail. However, this is just a small part of the overall cost. The final price you pay is part of a complete system that includes the inverter, racking, wiring, and labor, with panels typically accounting for only 12% of the total cost.
The price of a panel depends on three main factors:
- Brand and Reputation: Panels from established, financially stable manufacturers often cost more but come with a higher level of trust. A strong brand is more likely to be around for decades to honor its warranty.
- Efficiency: Panels with higher efficiency ratings (e.g., 22%+) can convert more sunlight into electricity. This means you need fewer panels to reach your energy goals, which can save on labor costs and valuable roof space.
- Warranty: This is a crucial metric for long-term value. Premium panels often come with longer product warranties (e.g., 25+ years) and a better performance warranty, which guarantees a higher percentage of power output after 25 years.
The Total System Cost: A Smarter Approach
Focusing only on the price of an individual panel is a common mistake. A professional always evaluates the total system cost. While a premium, high-efficiency panel may have a higher sticker price, it can be a smarter investment for a few key reasons:
Enhanced Reliability: A superior warranty on a premium panel provides peace of mind, protecting your investment from unexpected failures and ensuring your system delivers a high return for years to come.
Reduced Installation Complexity: Fewer panels mean less mounting hardware and simpler wiring, which can save you money on labor and materials.
Maximized Production: On roofs with limited space or shading issues, a more efficient panel can produce significantly more electricity, leading to greater long-term savings.
Is It Worth Getting a Battery With Solar Panels?
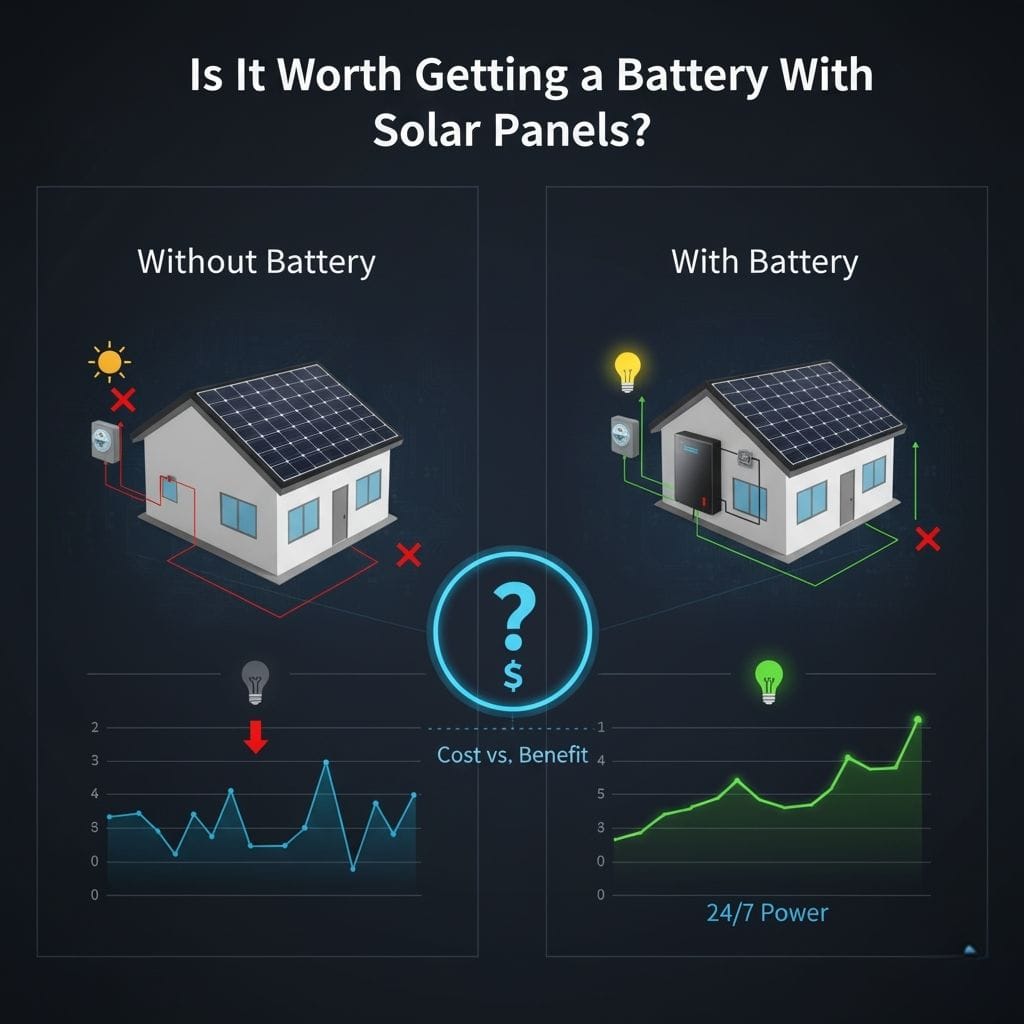
Adding battery storage is a significant step that transforms your solar system into a more versatile and resilient energy solution. While batteries add to the upfront cost, their value extends well beyond a simple financial return, providing energy security and greater independence from the grid.
The Why: Beyond ROI
While a solar battery may extend your payback period, it’s a strategic investment that offers a number of key benefits.
- Energy Security and Independence: The most immediate and tangible benefit of a battery is having backup power during an outage. In a blackout, a solar-only system will shut down to protect utility workers. A battery, however, allows you to continue powering your critical appliances, providing a level of energy security that is invaluable during storms or grid failures.
- Maximizing Self-Consumption: A battery stores excess energy your panels produce during the day, so you can use it at night. This is particularly valuable for homes on Time-of-Use (TOU) electricity rates, where power is more expensive in the evening. You can use your own stored, “free” solar power instead of buying expensive electricity from the grid.
- Grid Support: Batteries help stabilize the local grid during periods of high demand. In some areas, utilities offer incentives for homeowners to discharge their batteries during peak hours, creating a “virtual power plant” that helps to balance the grid and can even earn you money.
The Technology: Today and Tomorrow
Lithium-ion batteries are the current standard for home energy storage, praised for their high energy density, long lifespan, and low maintenance. However, the battery market is evolving rapidly. New technologies are emerging, such as solid-state batteries, which promise even greater safety, longer lifespans, and higher capacities. While these technologies are not yet widely available for home use, they signal a promising future where battery storage will become even more affordable and efficient.
Do Solar Panels Generate DC or AC?
The solar panels on your roof do the incredible work of converting sunlight into electricity, but they produce it in a form that your home can’t use directly. This is where the solar inverter comes in—it’s the brain of your system and one of the most important components.
The Crucial DC to AC Conversion
Solar panels generate Direct Current (DC) electricity, which flows in one direction. Your home’s appliances and the entire power grid, however, run on Alternating Current (AC) electricity, where the flow of power changes direction rapidly. The inverter’s sole job is to seamlessly convert the DC power from your panels into usable AC power. This conversion happens in real-time, allowing you to power your lights, TV, and other appliances with clean solar energy as it is being produced.
The Brains of the Operation
A modern inverter is much more than a simple converter. It is a smart device that is essential for maximizing your system’s performance and ensuring safety.
- Maximum Power Point Tracking (MPPT): The inverter uses advanced algorithms to constantly monitor your panels and adjust their output to ensure they are always producing the maximum amount of power, even on a cloudy day.
- Safety and Compliance: It includes critical safety features like rapid shutdown, which automatically turns off power at the panel level in an emergency. The inverter also acts as the gatekeeper between your system and the grid, ensuring the power it sends out is perfectly synchronized with the utility’s grid frequency and voltage.
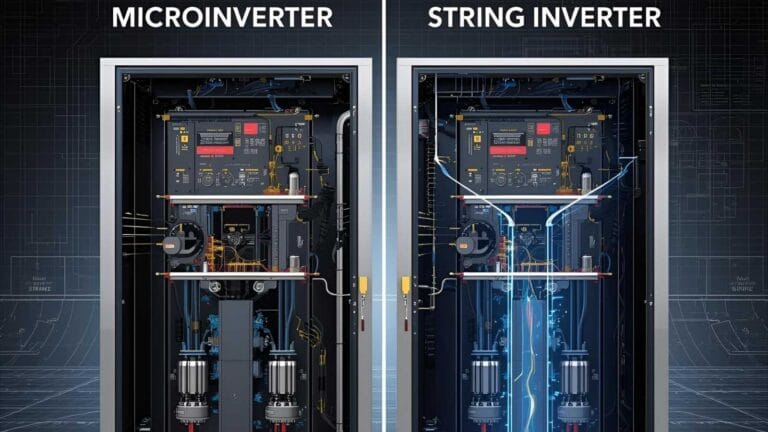
The Different Types of Inverters
In the past, most systems used a single string inverter, which was less expensive but was less efficient if a single panel was shaded. Today, two main types are available:
Power Optimizers: This is a hybrid approach where a small device on each panel optimizes its DC output, but a single central inverter still handles the final DC-to-AC conversion. This provides the efficiency benefits of microinverters with the lower cost of a string inverter.
Microinverters: These are small inverters placed on each individual panel. They optimize the power from each panel independently, ensuring that if one panel is shaded, it doesn’t affect the performance of the entire system.
Do Solar Panels Work on Cloudy Days?
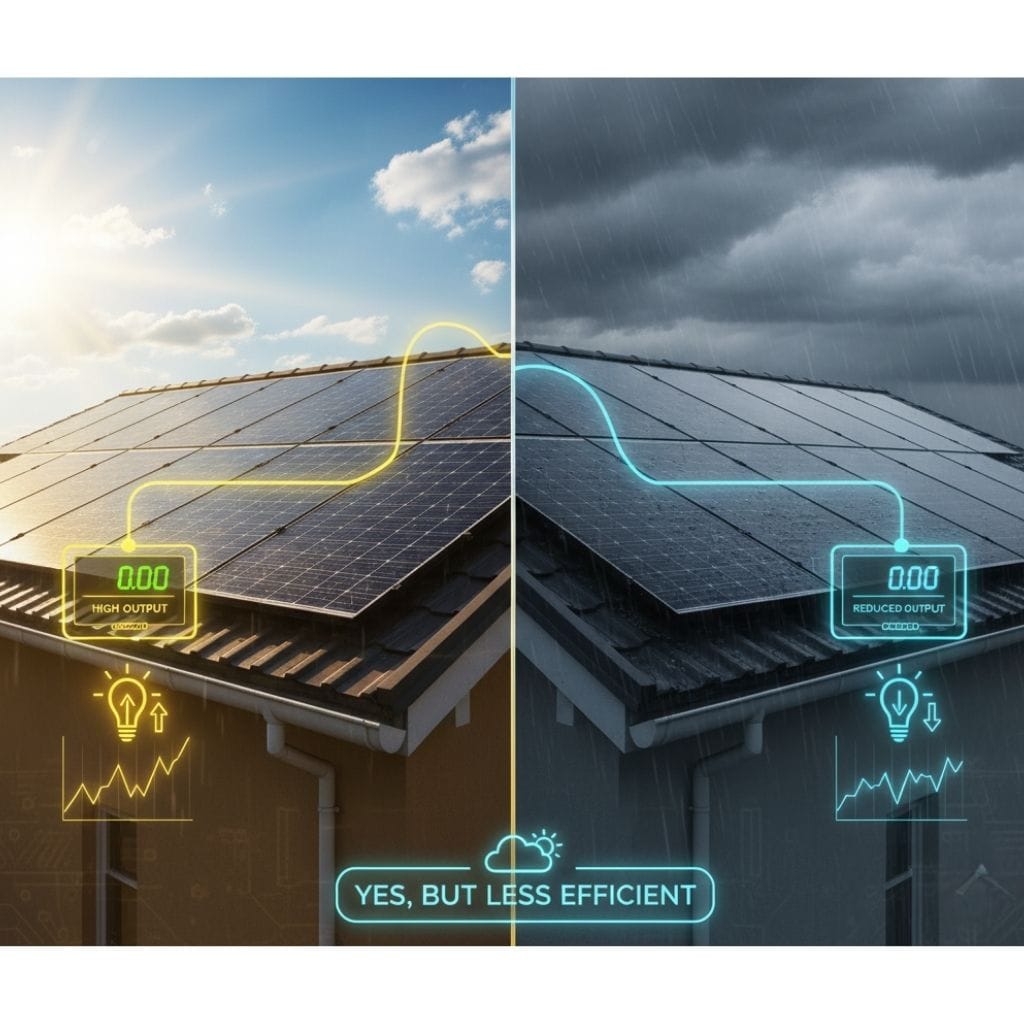
It’s a common and understandable question: if my solar panels need the sun, what happens on a cloudy day? The simple answer is that they continue to work, but at a reduced capacity. Understanding why and how they do this is key to setting realistic expectations for your system’s performance.
How Panels Work Without Direct Sunlight
Solar panels don’t just use direct sunlight; they also use diffuse sunlight, which is the light that passes through clouds or bounces off the atmosphere. Even on a heavily overcast day, your panels will continue to convert this diffuse light into electricity. While their output may drop to 10–25% of their peak capacity, they are still working.
This is why a solar system can still be a worthwhile investment in regions with frequent cloud cover, like the Pacific Northwest or the United Kingdom.
Maximizing Performance in Cloudy Climates
The right equipment and installation techniques can help you get the most out of your system, even when the sun isn’t shining.
- High-Efficiency Panels: Investing in high-efficiency panels is particularly valuable in cloudy climates. These panels are better at capturing and converting diffuse sunlight, which can lead to a significant increase in overall energy production over the year.
- Optimal Installation Angle: A professional installer can adjust the tilt angle of your panels to maximize their exposure to the sun’s path, helping them capture as much light as possible, even when it’s scattered by clouds.
- Microinverters and Power Optimizers: In cloudy conditions, a system with microinverters or power optimizers can be especially effective. These devices ensure that if one panel is shaded by a cloud, it doesn’t affect the performance of the entire system, unlike a traditional string inverter setup.
The Long-Term Value of Your Investment
Beyond the monthly savings, installing solar panels is one of the smartest home improvements you can make. The long-term financial and environmental returns are significant.
- Increased Home Value: Solar panels are a high-value asset. Studies show that homes with an owned solar system sell for an average of 6.8% more than comparable homes without one. This can translate to tens of thousands of dollars in added value, a return that often surpasses the initial investment.
- Energy Security: Your home becomes a mini-power plant, providing a crucial layer of security against rising electricity prices and a buffer against blackouts, especially when paired with a battery storage system.
- Environmental Impact: By generating your own clean power, you are directly reducing your household’s carbon footprint. The average residential solar system can prevent several metric tons of CO2 from entering the atmosphere each year, an environmental benefit that pays dividends for a sustainable future.
Your Next Step: A Professional Assessment
Now that you’re armed with the knowledge to make an informed decision, the next and most critical step is to get a professional consultation. A qualified solar expert can provide a detailed, site-specific analysis that accounts for your home’s unique characteristics, from roof orientation to local sunlight patterns. They will help you design a system that not only meets your energy goals but also maximizes your long-term savings and ensures your solar journey is a complete success.
Reference: U.S. Department of Energy (DOE)
Click to read our article, Future of Solar Energy: Trends to Watch in 2025 and Beyond.

Solar Energy Enthusiast & Renewable Energy Researcher
Vural’s journey into solar energy began four years ago, driven by frequent power outages and high electricity bills at his own home. He has since gained hands-on experience with both personal and commercial solar projects. At solarpanelresource.com, Vural shares his real-world insights and in-depth research to guide homeowners and business owners on their own path to energy independence.